In modern day society we are obsessed with the visual aspects of life. Look at how journalism has changed with images crowding, already scarce room of columns of newspapers and magazines. I assume that most college students have Facebook and the network alone thrives in pictures. The thin veil of a social network covers the vain reason why we are addicted to Facebook: to display our photos.
Photography, everyone seems to love it. We let our frugal pockets leak and end up purchasing expensive DSLR’s or otherwise known as “Big Fancy Cameras.” However, buying this camera alone won’t result in spectacular photos you see in travel magazines and fashion magazines. Sure, the megapixels are practically double the normal cameras. But megapixels only allow the photographer to capture the image more clearly and detailed with a variety of colors. So, the question is… how do I make my photographs look professional without spending what amounts to a semester’s worth of tuition on market-driven, overpriced lenses? The 3 tips I’m about to give alone will boost the quality of your photographs. The best part is… it’s FREE!
Tip 1:
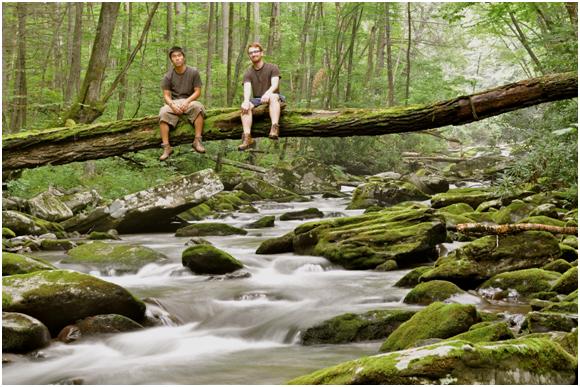
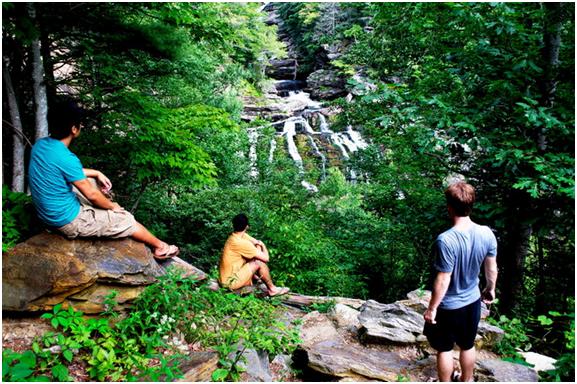
All your photos should be shot in NEF Format, commonly known as RAW, and this is very easy to do. Go to your settings and find image quality and simply change it. DSLR cameras may vary in where it is located. But as long as you are literate you can find it. The reason for this is because RAW allows you to capture more color into a photograph, thus, making your photographs more vibrant and rich. The example to the right is a textbook definition of rich and vibrant color. The saturation of the photo bursts due to RAW being able to capture a wide range of colors. This is FREE, by the way.
Tip 2:
The exposure in camera according to the light and situations can do wonders for your photographs. The silky water and fogs on the beaches and all the smooth and soft photos have been tuned with exposure. Simply go to your exposure settings and set it for a few seconds and tweak it from there. The example above is an ideal outcome if used correctly. When attempting this, you must use a tripod or the entire picture will end up blurry due your hand being unstable, no matter who you are. The key to this technique is to determine how fast the water is flowing or object is moving then set your time to get a blurred image of the moving part while capturing still life sharply as ever. Don’t forget to shoot it in RAW.
Tip 3:
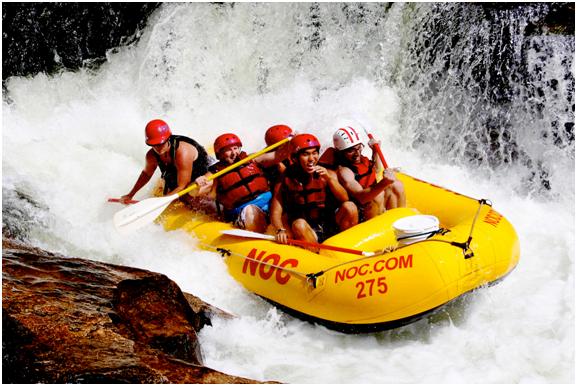
I feel that the most under used part of a camera is the lock button above the shutter release button (button you click to take a photo). Most DSLRs that have been manufactured after 2000’s have this plastic nub you can turn once you push in the shutter release button to keep it down. This feature allows you to take multiple pictures without manually clicking after them. What I did with the example above is that I used a tripod and set it on a solid rock away from the water and left it. Of course I locked the shutter so it would constantly take photos of the waterfall while I was hiking up with the raft. This resulted in about 600 unwanted photos of nature and 4 photos of myself in it and only 2 of them were sharp enough to use. I understand that this is a tremendous effort and risk to leave your camera running in middle of no where but to capture spectacular images you have to break beyond the confinement of your logical thoughts. Become innovative.
All the examples, tips on photography and where to travel for cheap can be found Rogue Scope.
Su Hawn Chung is an Editing, Writing and Media major at Florida State University in Tallahassee, Florida. He hopes to become a Photojournalist in the future, traveling the world. In his spare time, Su Hawn enjoys surfing, sailing and backpacking to vast parts of the world. Su Hawn works as a photographer for Florida State’s official campus newspaper, the FSView, and interns as a Photoshop editor for a sports fishing company in Costa Rica. You can find out more on his works and ask questions at Rogue Scope.


